
What is a dropdown?
I’m 100% sure most of you reading this post, know what a dropdown is. We interact with hundreds of websites and user forms every day. Dropdowns are such a beautiful user interface objects, that they make the lives of the user and the one who creates the form much happier. It reduces the pain of typing something in the box for the user and the pain of resolving inconsistencies in the data for the form creator. Let it be choosing the person title (Mr./Ms./Mrs.) to choosing the city you’re from to anything under sun. Let me start with the very basic things in this post, which many of you might already know. But I’ll slowly come to the very interesting ones in the subsequent blog posts.
How is dropdown useful in Excel?
Excel is unarguably one of the best data entry software and the most widely used across the fields and by a wide range of people.
From a user perspective, when I’m entering a number of rows of data, it’s difficult for me to type the text in a particular column every time I create a new row. Let’s say I am entering the transactions happening in a vegetable stall. Then I need to type the name of the vegetable every time a transaction happens, number of Kilograms the customer took, the amount he/she paid etc. And when I’m analyzing at the end of the month to understand the sales of each vegetable, I will have to add new vegetables to the dictionary,
- Tomoto
- Tamoto
- Tamato
- Tomat etc. 🙂
I don’t make these mistakes because I don’t know how to write a simple word “Tomato”; but while entering loads of data I tend to make small mistakes, which will trouble me a lot at the end. So, a dropdown is inarguably one of the most useful data entry elements in Excel.
How to create a dropdown list in Excel?
There are multiple ways in which you can create a dropdown list in Excel.
- Data Validation
- Form Control (Combo Box)
- ActiveX Control (Combo Box)
But of these methods, Data Validation is the most used method, for its simplicity. Later on, I’ll explain the pros and cons of each method, so that you can choose the best method among these for you.
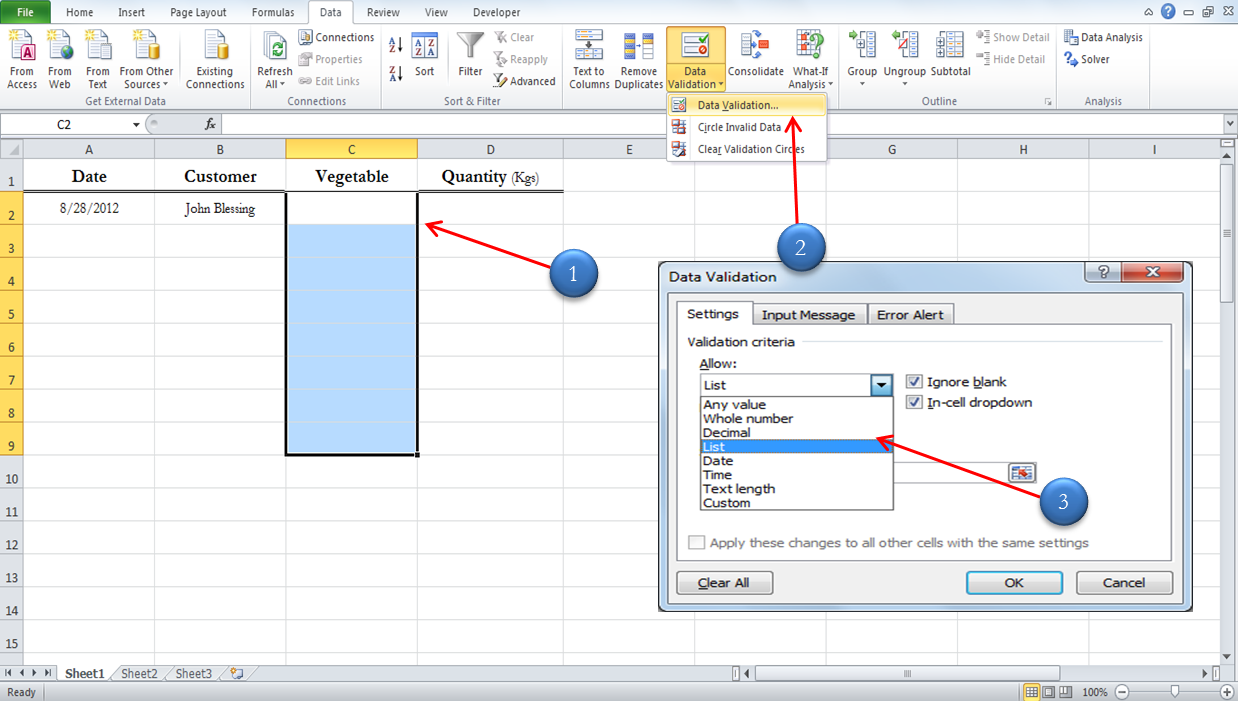
Creating a dropdown list in Excel through Data Validation
Before going to explain how to create a dropdown list, let me tell you what a Data Validation is? It controls the type of data or the values that users enter into a
cell. For example, you may want to enter only positive values in a cell, only ‘time’ in a column, or a text below the specified length. You can define all these conditions through Data Validation. Even dropdown list is a data validation where you’re constraining the user to use only those set of words in that cell. Again, in creating a dropdown list through data validation, there are different ways in doing it. Here are those…
Writing the complete list in the Source Field
1) Select the Cell (or) set of Cells in which you want to see the dropdown.
2) Go to “Data” Tab –> Data Validation –> Data Validation
3) Select List in the “Allow box”
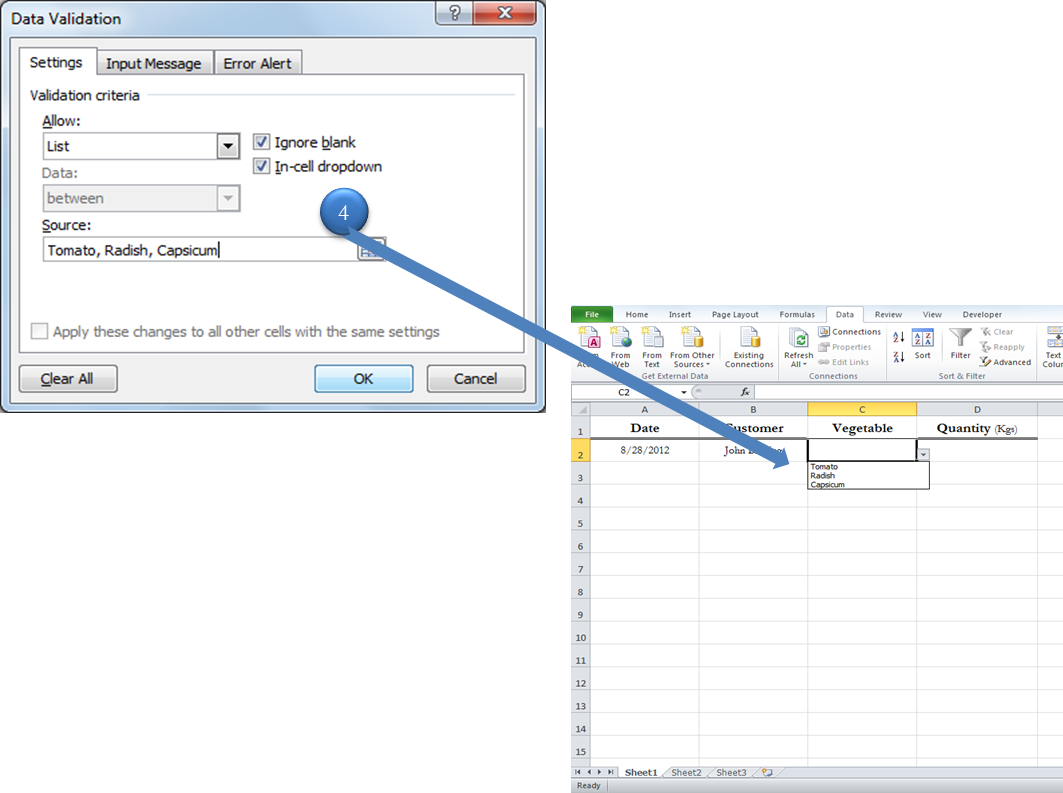
4) Just enter the names you want to see in the dropdown list in the “Source” Box
That’s it!!! Go to the cell for which you created validation. Click on the dropdown button, you’ll be able to see the names of the vegetables you’ve entered.
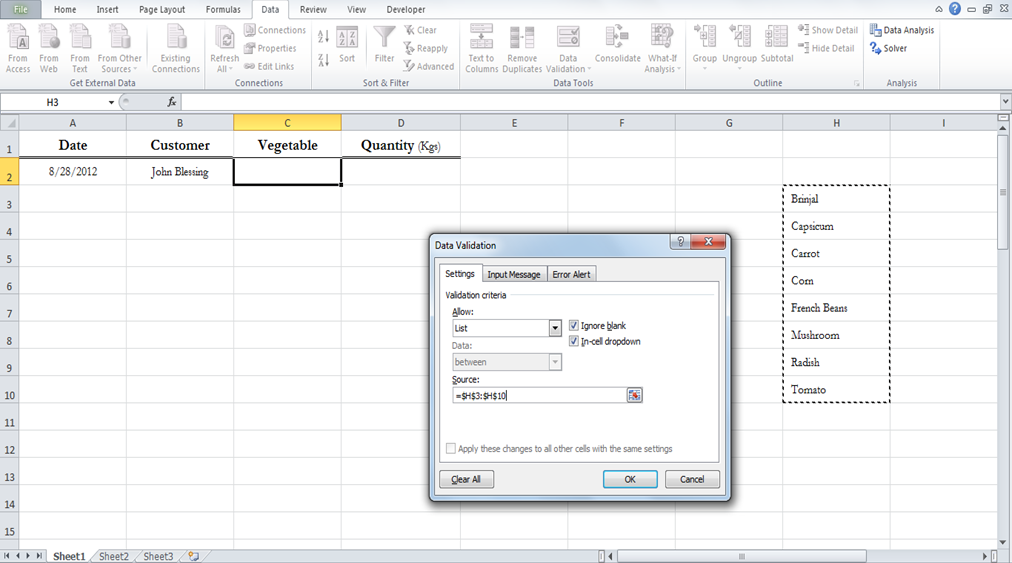
Selecting a list of items in the same or other sheet
In the aforementioned example, instead of entering the names in the source field, you can choose a list which is already entered in the same or different excel sheet.
The best advantage of this method is, if you remove the vegetable name ‘Carrot’ from the list and replace it with ‘Lady Finger’, it will automatically update the list without your intervention. The only problem with this method is, if you append an item to this list at the end, it won’t get reflected in the dropdown.
Using Dynamic Defined Names
1) Select the list you want to be shown in the dropdown
2) In the Name Box which is beside the formula bar, enter the name and click ENTER
3) That will name the selected table as written in the “Name Box”
4) In the Source Field, write “=” followed by the Table Name you’ve selected
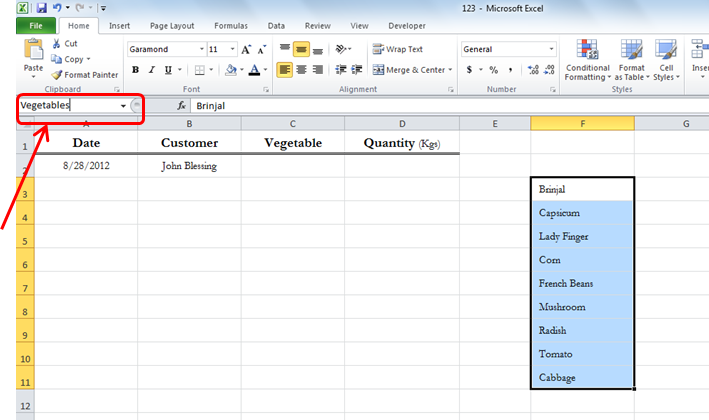
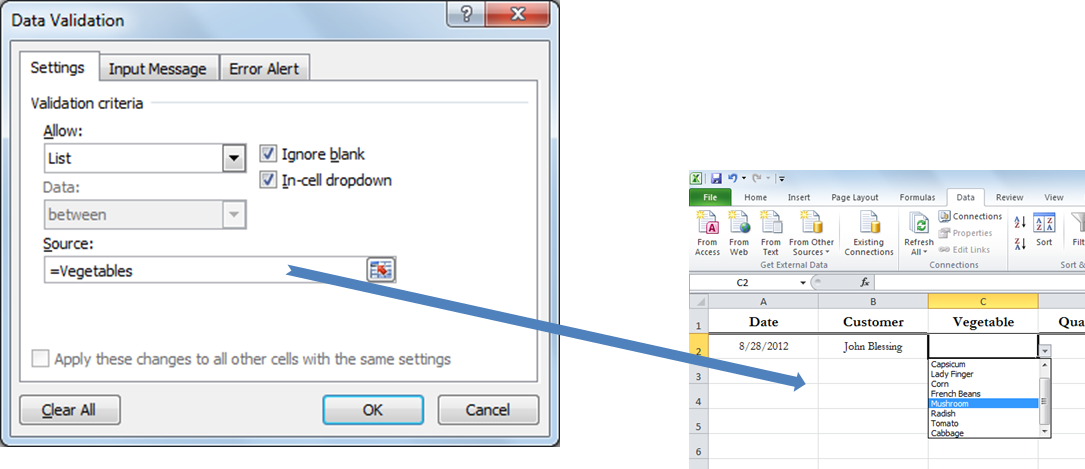
There it is! You’ve created a dropdown!! It’s as simple as that!
“Is that all about dropdowns?”
“No! Please wait a moment!”. This is just the beginning and it’s going to get more interesting in the next posts in this series. I will be back with a post on Friday and till then adieu.